Episode 54: Choosing saddle pads, cinch/girth, billets & breast collars
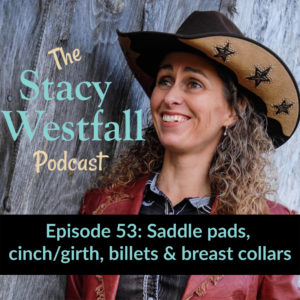
In this season of the podcast, Stacy is discussing horse tack. Today, she’s covering several items: saddle pads, cinches or girths, billets, and breast collars. .
When it comes to saddle pads, Stacy recommends pulling the pad up into the gullet of the saddle to ensure proper fit and avoid pressure on the withers. She emphasizes that the saddle should fit without causing discomfort or rolling.
For selecting a cinch for your Western saddle, Stacy advises using the longest one possible without it overlapping the saddle pad. This prevents the billet strap from applying excessive pressure on the horse’s side and allows for more comfort and freedom of movement.
Stacy also discusses the choice between tying a knot at the top of the billet or using the holes in the tie strap to secure your saddle. She prefers using the holes for a more secure fit, especially during advanced riding movements.
Finally, Stacy talks about breast collars, which have seen a resurgence in use, particularly in trail riding and competitive events like ranch horse and mounted shooting. There are various styles of breast collars available, including three-piece breast collars, Montreal breast collars, and pulling collars.
These items play a crucial role in ensuring the comfort and fit of your saddle and horse, so it’s essential to choose and maintain them carefully.
Click Here For The Full Show Notes[00:01:27] When I think about saddle pads, one of the tips I have is to go ahead and pull that saddle pad up into the gullet of the saddle. I use a contoured saddle pad, but even though the saddle pad already has a natural curve to it, it is still important to pull that pad up into the saddle. On one of the most recent videos I just posted shows the saddle pad sitting on Gabby’s back and then I put the saddle on top of it and you can actually see that I can’t slide my hand underneath the saddle pad because the pressure of the saddle is pushing down on that pad.
[00:02:12] Then I lift the pad, that contoured pad up into the gullet and then you can see that I can easily stick my hand. Following the line of her neck. And I can actually feel her withers even though she has the saddle and pad on. That’s how your saddle should be fitting. If there’s pressure on the withers, that’s gonna be uncomfortable. But it also will accentuate the saddle rolling if you don’t lift it up off. So when you can actually lift that pad up into the saddle and you can fit your hand down there, that will prevent your saddle from rolling as much because then the saddle will be properly fitting. Instead of having that weird pressure on the withers, which actually helps your saddle want to roll around. So not a good thing you don’t want the saddle rolling, so lift that pad up in. If I’m going to give you just one tip about selecting a cinch for your Western saddle, what I want you to think about is that I want you to use the longest one you can without it touching the saddle pad. And I have several different lengths laying around here so that I can change because sometimes you’ll have a horse gain weight and then you need to use a longer one or sometimes you’ll get one that’s getting really fit. That was too heavy and you might and I might switch to a shorter one. But here’s the reason that I want to use the longest cinch possible without it overlapping on my saddle pad.
[00:03:51] And it is because I don’t want the billet strap or the tie strap. That’s that leather or nylon piece that goes from your saddle and holds your cinch on. I don’t want that putting a lot of pressure on my horses side. So again, on that video that I’ve just made using Gabbie, I purposely have a section where I put the the cinch that was too small on her and you could clearly see that the strap was touching. And what’s really interesting is not only touching, but it made it very difficult for me to slide my fingers underneath. You can actually see her. Her skin kind of pucker when I’m trying to push my fingers underneath there. Then when I switch to a correctly fitting cinch. So there’s not very much space between the cinch and the pad. Maybe a couple of inches. You can then see that it’s very easy for me to slide my fingers behind there because the pressure is not being applied to her side by that billet or tie strap. And to me, that’s really important because when I see horses that have a lot of pressure being put on their sides with the billet or the tie strap, I know that there’s more of a likelihood of that rubbing on the horse. Not to mention it puts the buckle of the cinch a lot further down into that horse’s shoulder area, which is another reason that could be rubbing. So I use the longest cinch I can without it overlapping onto the pad.
[00:05:22] And again, you can see that on that video. And I’ll go ahead and put a link to that video in the show notes of this podcast. Another question I get asked quite a bit in regards to the billet or the tie strap is do you tie the knot up at the top to secure your saddle? Or do you use the hole and the little tongue that is on the on the cinch? Personally, I now a days use the holes that are in the billet and or the tie strap and I use the holes that are in there. And when you’re gonna do that, if you’ve never done that before, what you do is you tighten it up, you tighten up the saddle. You you pull that tie strap tight and then you have to back that off just a little bit. And I’ll I’ll make a video and show that, too. But in order to make that little tongue on the cinch, stay snug. You’ve got to put it into there. And then you actually almost feel like you’re reaching up there and loosening that that that billet tie strap just a little bit so that it holds snug on that hole. But I also remember when I was growing up, this somebody showed my mom and I how to do that. And we were kind of terrified that we were gonna do it wrong and it didn’t feel that secure. So I know the entire time I was growing up and until I went to college, because remember again, I went to an equine college until I went to college.
[00:06:56] My mom and I always tied the knot, which at the top of the that tie strap, there’s a way that you can you can tie this little knot and make it tight. And that if you’re used to doing that, that’s fine. The reason I don’t do it as much is because when you start to do a lot more advanced movements with your horse and let’s just say that I’m working on lead changes and I want a lot of freedom of movement in my leg. Sometimes having that bunched up knot up underneath, there is a little bit more of something that will kind of catch the fender of the stirrup when I’m trying to move it around. And as you just become more and more aware, as you ride for more and more refinement, it can be something that you can feel. And so because that’s what I do a lot. That’s why I don’t tend to tie that knot. But again, if you’re trail riding, if you’re new to this and if you’re not comfortable with the idea of using the hole, don’t do it, just totally tie the knot. Like I can still tie the knot. And I would still do it to go trail riding casually if I needed to and wouldn’t have a problem at all with it. The last subject I’m going to offer a tip on before we jump into my conversation is breast callers. So a lot of times when people are coming over here to ride, we’ve got these big hills in the state park out behind us.
[00:08:22] And a lot of times they’ll say, you know, do I need a breast collar or do I not need a breast collar? And I typically will say, if you’re not sure, let’s go ahead and put one on. But what do I do when I go out there most of the time? I don’t have one on. But listen to this. This is really interesting because I discovered this on a trail ride with friends the other day. We were out there and we were climbing up one of these pretty good sized little hills that we have out here. And I was riding along and I did not have a breast coller on. Now my saddles fit well, but I got thinking this person up ahead of me is having trouble with their saddle staying forward. This could either be a saddle fit issue or this could actually be a phase of training issue. And what I mean by that is I am most likely to put a breast collar on when I go out and ride up and down the hills behind here behind my house. I’m most likely to put a breast collar on with a less experienced horse and I’m less likely to do a on a more experienced horse. And that got me thinking as I was watching this this friend of mine ride up the hill. Why would that be? And I think it’s because the horses, as they get more comfortable and they get more powerful and they get more athletic about how they go up the hill, they’re not quite as likely to wiggle themselves out of the saddle.
[00:10:00] And as I was watching this person’s horse climb up the hill, it was not very coordinated because it lacked experience. And it was really interesting because I believe that at least a good part of what was going on there was that this horse was essentially like wiggling itself out of the tack a little bit. And that kind of explained to me one of the reasons why I just naturally will grab for the breast collar on the less experienced horse. Now I for sure see the point in the breast collar, and that is that it can actually help secure the saddle just a little bit. But you’re going to hear in my interview with Trish, I totally agree with what she says, which is if you have a saddle fit problem to wear, your saddle keeps sliding back. You need to fix that problem. Don’t go to the breast collar to fix that problem. So would this person that was riding the question that I had, is your saddle moving like this all the time or is this just happening when you come up here and your horse is learning to climb the hills? So there’s my tip for breast collars. Now let’s jump into my conversation with Tricia Campese from Stagecoach West. You’ll find more tips as well as the different materials that are used and even some ideas for maintaining and fitting your tack.
[00:11:28] Let’s jump in and listen to this conversation.
[00:11:34] Well, Trish, on today’s podcast, I’d like to cover several different. I guess I might call them accessories, but they’re they’re kind of more than accessories because they’re a big deal. And the one I’d like to lead off with is the one I mentioned in the last podcast, which is saddle pads, which there might be more options and saddle pads than there are in saddles some days I think when I look. But I bet you can break it down into a more manageable, more manageable. A way to look at it. Then what I would do so. Can you tell me a little bit about saddle pads and what to look for? What are the options?
[00:12:08] Well, as we had talked earlier, our favorite thing to tell people is that every good saddle should have a good saddle pad. And I we’ve sometimes wondered why somebody would spend, you know, whether it’s, you know, five hundred dollars and up on a saddle and then they want to spend twenty dollars on a saddle pad. We there are so many wonderful materials out on the market for saddle pick ups nowadays. The technology behind them is just amazing. So there’s fleece, there’s wool, there’s, you know, a plethora of different type of pads. In a lot of times people come in and they’re not you know, they come in sizes.
[00:12:57] If you didn’t buy the saddle from us the same thing, have a picture of your saddle or know that it’s a square skirt or around skirt saddles come pads come in sizes according to what fits under your saddle. You know, and there’s so many good materials out on the market nowadays, you know, readability or you know, if you’re riding performance horses and you’re riding multiple horses, you might want to look at something that’s super easy to clean, especially if you’re using it from one horse to the next horse. Same thing with it drying out easily.
[00:13:39] We do sell quite a few pads to correct some saddles that don’t fit 100 percent. You know, there’s different types of pressure, really, pads that we sell, a lot of that.
[00:13:52] Do some help with making your saddle fit a little bit better. What would those look like?
[00:13:58] Most of those ones have a a pressure relief piece that is actually built on the underside of the pad instead of on the top side of the pad and designed to fit behind the shoulder. And it follows the curve of the horse’s center part with their back. A lot of horses get that drop behind the shoulder, especially an older horse, which we’ve noticed more and more people nowadays are riding their horses well into their late 20s. And saddles were never designed to fit, you know, an 18+ year old horse. Yeah. They were designed to fit young horses. So that is and you know, a thing that we designed because we kept seeing it more and more in our saddle fitting when people would come to our store. So they just helped balance the saddle out and they fill in with horses, started to muscle in that.
[00:14:54] And then we talked a little bit at one point, like you’re seeing a rise in the number of pads that have a contour.
[00:15:00] So almost all the saddle pads that I have in our store contoured tops. And it just makes sense. Why wouldn’t you want a pad that isn’t already kind of in the shape of the horse’s top line?
[00:15:12] Yeah. And I’m thinking it fits better. Exactly. So I’m thinking if you’re listening to this and you’re not quite sure what that contour is, if you can imagine laying the pad on the floor and it’s kind of folded in half the way that it would be, you know, roughly like if it was on your horse, like if it’s just flat, square or, you know, then then it’s not contoured. But if you if it’s got that higher spot where the withers would be in, then it kind of dips down. There’s that shape like you visualize the top of a horse. Normally that’s a contoured pad and that tends to be the leg we talked about in the saddle fit. You want to be able to keep the pressure off the top of the withers. So if you’re saddle stays up at the top of the withers, but if your pad is like pushing a ton of pressure down there, that’s not good. So these contoured pads aren’t really helping. How many different like kind of shim type pads and different things like that do you have in the store?
[00:16:07] I probably have 10 to 15 different types for mobile pads. Okay. And this removable pads are the ones that you could pull the actual pieces right out of the top of the pads. And so if your horse was extremely high, withered, but the rest of them was wide, or you could leave the front shim and you could go back to out. Sometimes it’s a combination. You need all three shims and then.
[00:16:33] What about thicknesses? Because I’m guessing that’s another big question.
[00:16:37] Yeah. You know, if you have a good fitting saddle, then we typically recommend either a half inch or three quarter inch. You would not want it if you have a good fitting saddle. It’s like having a good fitting shoe. You would not add more padding to the inside of a good fitting shoe. It would make a shoe fit tighter. And that’s kind of the same concept with pads. You know, a thicker isn’t always better.
[00:17:01] Yeah. Because that can actually make it almost like the saddle is going to fit almost more narrow because you’re kind of filling in that spot. That’s that’s a good point, too. Is there anything you know? I do know that sometimes when you’re looking at the nicer pads, like what would you say the price differences between an inexpensive one that you that you of are trying to avoid selling, really, versus the nicer one? What’s the price difference there?
[00:17:29] Ok. Price the price on the less expensive ones would be anywhere from 20 to say forty nine dollars. Anything up above that you’re starting getting into a better quality of material. You get into a, you know, 100 percent wool felt instead of a synthetic felt . Wool felt is very breathable in nature. They dry quickly. They take on a lot of impact off the horse as they are a natural shock absorber. Typically you’re looking at spending well over eighty nine dollars on a good pad. They can be anywhere from eighty nine to two hundred thousand.
[00:18:17] Is there anything you can do to extend the life of that pad. How long would those pads. You know, I know it’s probably gonna vary quite a bit. I mean if you ride one horse occasionally in that pad or if you ride five horses a day every day, you know, you’re going to have a big difference in in that kind of stuff. But if you like, what can you do to extend the life of these pads?
[00:18:41] A couple things. Is that what after you’re done using them as I always flip my pads upside down to let them air dry? Depending on the material, obviously a wool fleece is gonna be a little harder to take care of. You should wash them at least once a year. There is product from a couple different companies that make they make pad wash. You should want to or do something to maintain your pad. Personally, I’d use baby shampoo because it’s hypoallergenic and I won’t harm a horse and just kind of power wash the bottom of the pad with the full pads.
[00:19:26] And you can’t do it right after you use it. But if you wait a day or two the paddle dry you’ll see where it was and you just kind of perfect. Curry it off and brush off the dirt or a vacuum or extend to nice you know a little a little hand-held one.
[00:19:41] Yeah. Very good. So I know that, I know that like you like you said before, you know, a good fitting saddle is number one. But one thing we discussed in that podcast about Saddles was that, you know, sometimes the horses are in a stage where for me, I’ll start a young horse. Understandably, they don’t have muscle for being worked because they haven’t been worked and they don’t have experience carrying the rider or the saddle. So they don’t have a muscle built up for that. So a lot of times I know that when I’m first starting out with them, I know that as they’re building, I actually change saddle pads a fair amount because I’m kind of trying to help them fit the saddle a little bit different. So. So I’m going to a lot of times I’ll choose a a saddle that’s a little bit wide if I’d rather have a little bit wider than a little bit narrow because of that same shoe analogy that you gave. But then I can play around quite a bit with the. So a lot of times I’ll be a little bit lacking because they don’t have the muscle tones. I might go with something thicker. And then as they muscle up, as I work them, I can do a fair amount of adjusting with the saddle pad before, you know, because because my my saddles kind of in a range of fitting. I’ll just put it that way. But the horses in the process of changing. And so I know that for me, that’s kind of how I look at using the pads in my world. And unless you have anything else to add on that, I kind of wanted to jump into another category.
[00:21:18] The other category would be the cinch or the girth, which is kind of basically like an English versus Western terminology. So sometimes I’m guilty of of kind of interchanging those things.
[00:21:51] So when we’re looking at a cinch, again, you’ve got a bunch of different options. So. And your favorite thing sizing ago is something the size of lots of sizes. So bring the photo of your horse. Bring a photo of the saddle on the horse with the pad with the cinch that you’re already using. And so. Yeah. What are your what are your options in your store on on cinches.
[00:22:24] Oh. So cinches come in a bunch of different materials from neoprene to mohair to air flex. There’s also more. I’m trying to think what other ones. Wool, 100 percent wool fleece and some almost all of them nowadays except for the mohair. You can velcro the material off of the actual girth so that they’re washable. Mm hmm. And I think primarily what you need to look at is what what you’re used to using, what’s comfortable for your horse. Now, there are a few horses that are allergic to neoprene, so you should know whether your horse’s allergic to neoprene before you buy any neoprene girth.
[00:23:15] Mm hmm. The reason those have been popular is because they’re easy to clean off. And your trail riding with them. Nothing gets stuck to them. Yeah. Now they air flexes. Nice. Because it’s basically like a easy to wash off, but it’s got the you know, the airflow material that has those little ripples in them.
[00:23:38] And then mohair. A lot of people have gone back to mohair because they’re more natural breathable material and they’ve doubled them up now. But they all come in sizes.
[00:23:51] They all come in sizes. And so yeah, I know that there’s times that I’m trying to look on the on the little sizing tag. You can pretty much you could probably just measure like it’s a little sizing tag disappears or never was there. Is it pretty accurate to measure and end on the on the one that I am using now.
[00:24:09] You have the most the materials that I accept for the mohair string, you know. Now they have mohair and alpaca is the other new one that they’re doing. A lot of those will stretch out by. Oh, yeah. And within a half inch or an inch, figure out what size girth you need, you know, and then looking at what the proper girth size is for a horse. One a trick to measuring for us. If you’re not sure you can’t. You don’t have pictures is to just measure right around the horse where you’re skirt would go. You give us the entire measurement to we’ll be able to figure it out off of that. Or if you’re an English rider and now you’re going into Western, we can convert. We know how to convert to sizes or vise versa. If you’re a western rider and go into English, if you give us your western cinch, we can figure out what girth you need.
[00:24:59] Yeah. And and I know that, you know, it probably changes it changes a little bit more subtly when you change your saddle stuff because of the rigging. And and that stuff. But that’s a much more I guess that would be a more subtle, a subtle sizing thing. ‘Cause I know that there’s a couple of horses where if I changed to a different saddle, I need one that’s a little bit longer or a little bit shorter based on something in the rigging is changing that. How far down. Yes.
[00:25:27] Yeah. Yes. Yeah. So rigging on the side of the saddle can come in many options as well. They can be, you know, rigging can be more four-word can be stepped back a little bit or it can be dropped down as well. Mm-Hmm. And then too it would depend on if you’re using enough fill it or if you’re using to tie straps.
[00:25:48] Perfect lead in to billets. Can you tell us about the options for billets and what they are, where they go in and what might confuse people.
[00:25:59] Most of the confusion would come with, you know, used to be that most companies put it in off side billet basically is a single piece of leather and you just buckle your girth into the side of it so that one is decided to leave and all the time. And then it goes under the horse and then you use a tie strap. And the tie strap is usually long usually six and a half or seven and a half feet long. And that is the strap that we would normally try and make the beautiful little knot on the side. Or you can buckle with the girth if you on is the buckle on that side. But a lot of people have switched and gone back to using two tie straps on both sides. And typically why they’ve done that is because a few of the saddles are now coming with or angled rigging in the back. So that, too, can do what they call center fire rigging, center fire rigging, all that. As for is it makes you’re rigging the longer strap will then go through your girth and then through the back rigging and that helps stabilize the saddle a little bit more. If you do a lot of hill riding.
[00:27:16] Ok, so keep the saddle more centered. Hence the center fired rigging.
[00:27:21] Yeah. And so that’s changing what people are using for strapping.
[00:27:26] Yeah. Yeah, I see. We see more people using to tie straps than just the standard off ballot and a tie strap.
[00:27:35] Yeah. OK. That makes sense. And those also come in a range of materials.
[00:27:41] Yes. Leather it leather nylon. And then there are some new ones that are coming that have elastic in them. You know they’re trying to give it a little bit more stretch. It’s kind of like stretch pants I guess.
[00:27:56] I have not seen that. Yeah, I’ve seen leather. I’ve seen nylon and I’ve seen like a hybrid where they take like a make a sandwich of nylon with leather with leather around it. But I have not seen elastic yet.
[00:28:10] Yes. Now they have elastic.
[00:28:11] That is fascinating. So, yeah.
[00:28:14] It’s also something they did in the girths, too. Now we have a cinc that has elastic in the girth so that it stretches.
[00:28:22] It’s the same concept with the English has the elastic billet straps.
[00:28:27] Yeah. The side of their girth.
[00:28:29] Tell me about breast collars.
[00:28:58] Well, breast collars used to be something that everybody used when they were showing horses. I mean, when we sold them, you know, I’m talking back in the 80s, early 90s, it was always you got show saddle, you got the headstall that matched the reins and the breast collar. That was always a package type deal. And as the years went on, people got away from having a breast collar and meant to just, you know, and then they got away from needing the matching reins and always went with a certain style of rein,. And just the headstall they would get a ranch and headstall. But I see the breast collars starting to come back into that. Not so much the show world, but the trail riding world. More competitive stuff like the ranch horse stuff and the mounted shooters are all using breast collars now just to help kind of stabilize the saddle so it stays where it’s supposed to set. You would never want to buy a breast calor to solve a saddle fitting issue, though. Mm hmm. Good point. So if your saddle had a bad habit of sliding back every time you ride in it, that’s typically something needs to be fixed either in your pad or the way you tightened up or the fit of the saddle.
[00:30:16] We see the breast collars definitely in a more of a trail riding ranch. Look, coming back into the industry.
[00:30:25] Yeah. And how many different styles of those do you have?
[00:30:28] Well, there’s three or four different styles. Your typical three piece breast collar, which is the two straps that attach to the D rings on the saddle and then the one that goes to the center of your girth.
[00:30:42] And then now the new one is a running breast collar and also a what they call a Montreal breast collar. It’s been real popular.
[00:30:55] What does that one look like?
[00:30:57] The Montreal breast color is similar to a, well, English breast collar. So it snaps on the tap, rings of the saddle and it goes straight up the neck instead of around the shoulders.
[00:31:11] It’s a little bit more easy to adjust because the straps are don’t inhibit the shoulders. They tend to just go up the neck ’cause the strap that goes up around the top of the wither area.
[00:31:28] Okay. Yeah, this might be when there’s some photos in the into the show notes.
[00:31:35] Yes. And the pulling collars have also been probably the second best sellers next to the. It would be the regular standard three piece the Montreal and the pulling collars and pulling collars go up in wrap. They’d loop over your pommel on your saddle. Kind of the same concept as a Montreal breast collar. Just it looks more Western.
[00:32:00] Yeah. Yeah. So a lot of these are going to have a similar function, but a different look. You’re just you’re saying that the biggest function difference is the one that goes over the shoulder, you know, is actually in that shoulder movement. And then. The one that kind of wraps more around the neck is a little less on there and it should be fitted, so it’s a subtle enhancement to your saddle fit, not actually holding your saddle in place because at that point you have a saddle problem.
[00:32:30] I would say that’s a pretty, pretty ton of information for everybody to be digesting. On saddle pads. Cinches. Billets, breast collars. A lot of good food for thought on so many different ways that you can look at the materials and their current use and your horse changing. And yeah, this is a great reminder when I go back to something that I kind of do. Second nature, when I walk out to the barn and saddle my horse, it’s always fun. When I break it down and start trying to explain it to people, you go, Oh my. No wonder this can be intimidating or confusing because there are a lot of things to consider inside of each one of these little tiny subjects. So thank you so much for joining me today and explaining it so thoroughly.
[00:33:19] Oh, you’re welcome. Thank you for having me.
[00:33:25] A lot of the items that we talked about in today’s podcast are items that do need to be replaced. How often do you need a new saddle pad? Well, I’m going to compare that a little bit to buying a new pair of sneakers. So the more often that you use those sneakers, the more often you’re going to want to replace them. And the same thing’s going to be true for your saddle pad. So if you invest in a nice high quality saddle pad and you ride infrequently, then it’s going to last you a very long time. If you invest in a really nice saddle pad and you ride in it a lot, it’s going to be like those expensive pair of running shoes. It’s doing a lot of hard work and you know that those sneakers break down and you can feel a difference when you go to the store and put a new pair on. Well, that’s a great sign that you need to replace them. And I know that in sneakers they actually have like mileage and things like that. If you’re a runner, that they recommend how frequently you should replace them. And I would say I don’t have the number for you, but it is similar to the same idea when I’m riding my horses. I can actually tell a lot of times when my pad needs to be replaced because I will notice that it doesn’t have as much of that kind of cushiony feeling to it. I can start to see where the pressure is wearing on spots, on the on the pad that you can just see. Pressure has been applied. And the biggest thing I can tell you is that it will start to change the sweat pattern.
[00:34:56] So a lot of times when people are trying to figure out how their saddle fits, they’re going to be looking for pressure points. And one of the ways that a lot of people will do that is after they ride the horse, when they take the saddle on the pad off, you want to know if there’s a nice even sweat pattern or if it’s got these uneven or dry spots on it. And I can tell a difference in the sweat pattern between a new saddle pad where that will be a much more even pressure versus an older saddle pad that was just as nice, but has been ridden in for hundreds and hundreds of hours and something has changed. And I’m going to say that the material is breaking down just like those expensive sneakers that you can invest in. That doesn’t mean they last forever. I think maybe the most important item to check in your entire barn, at least for this conversation of what we’ve had, is those billet straps, the offside bill, especially because it’s something that we’re not touching and looking at as often can be really something that can wear without you noticing it. And it can be a very serious thing. I know that years ago I was riding and Jesse was out riding and he said, I’m gonna go outside and ride just a little bit. And I thought, I don’t know. I just have this funny feeling. And I followed him outside because I was riding a younger horse. I wasn’t quite sure I want to be out there. And I went out there and Jesse was riding on a much more finished horse.
[00:36:31] And he went down and he did a roll back. And his offside billet, it broke. And I happened to be looking because again, I had that strange like feeling I should be out there. The offside billet broke. And he had the most confused look on his face because he was still on the saddle, but he was falling off. But he hit the ground and broke his ribs and it turned out to be the offside bill it had been wearing, hadn’t been checked. And when that horse made that big move of that roll back. That gave and the whole saddle came off. Now I’m telling you, you really want to check the bitless, really the onside one can actually start splitting at the top also. But just make sure you check those things. I’ve been making a lot of videos for the YouTube channel that are kind of matching up with these podcast topics. So if you want to see some of this in action, you can go to Stacy Westfall dot com or you can search my name Stacy Westfall over in YouTube and you’ll find my channel where you’ll find a lot of these little videos showing the different pieces of tack. But you can also watch any of the trail to the world show or any of the different videos there and see all of these things in use. Remember that if you decide to go over it and shop on stagecoachwest.com, you can use the code ‘Stacy’ in the checkout to receive 15 percent off your entire purchase.
[00:38:03] Now that excludes saddles, but on saddles they do actually offer a 6 month and 12 month, zero percent financing. If you’re in the market for a new saddle.
SUBSCRIBE TO THE PODCAST HERE:


YOURS FREE
WHY IS MY HORSE...?